Creating an item
When you want to create one item at a time, please follow the below instructions
How do I do it?
1. Select Masters > Item. An Items screen is displayed. Select Add Item
2. An Add item screen is displayed
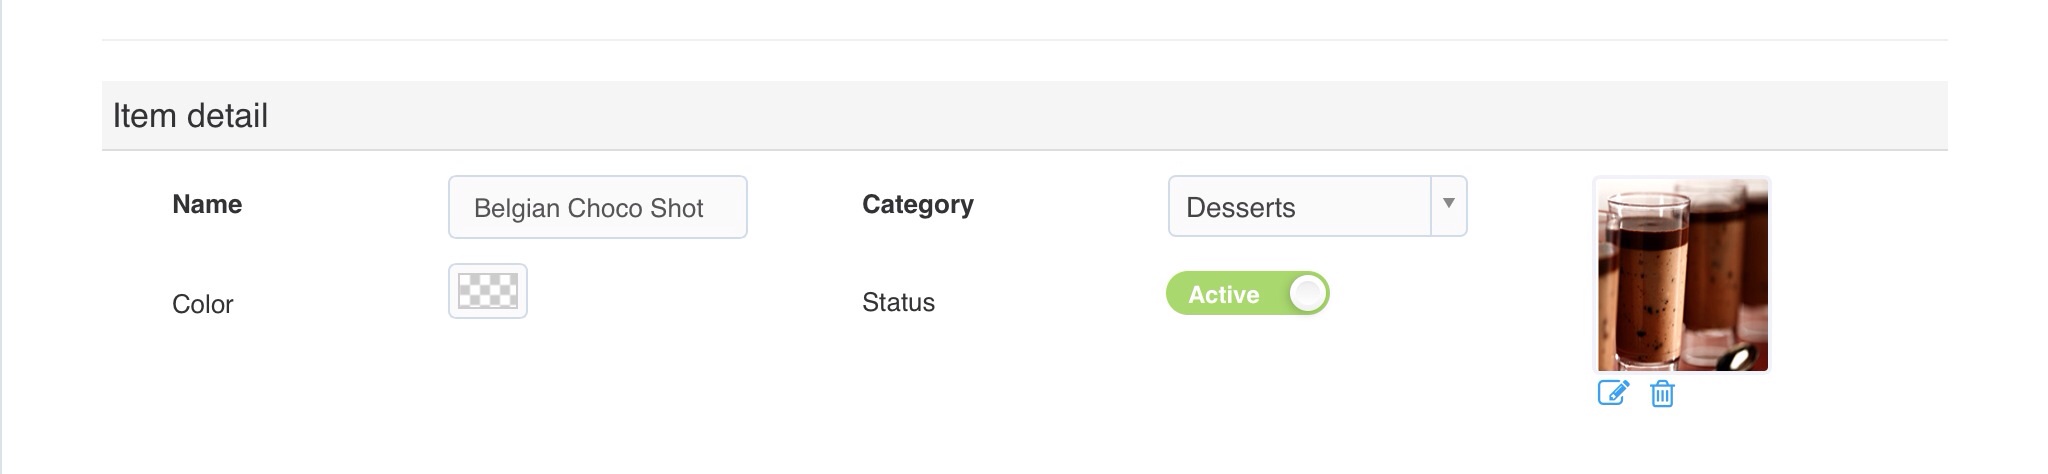
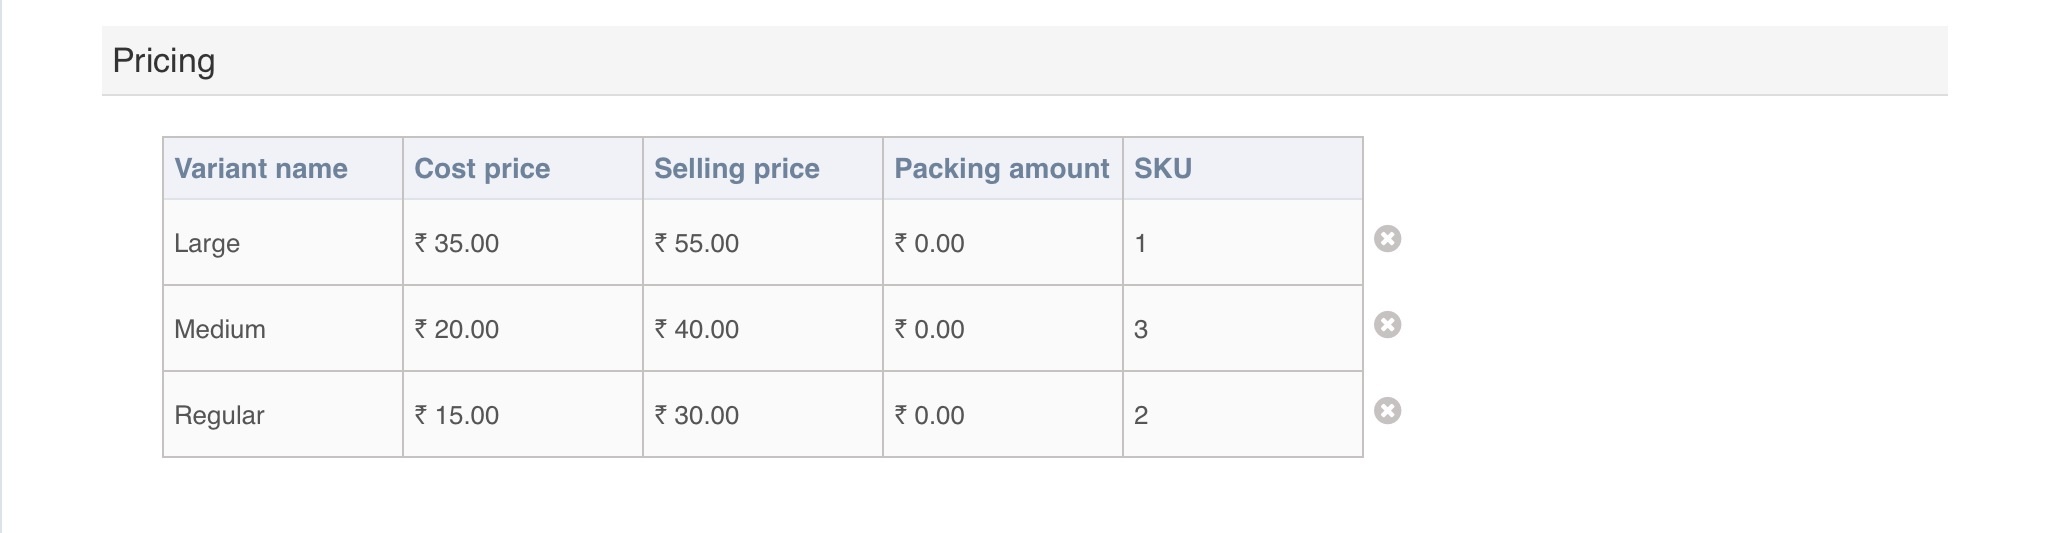
The Add item screen has sections Item detail, Pricing, Taxes and Item modifiersThe Item detail section, contains fields like Name, Category, Color and Item imageIn the Name field, enter the item nameIn the Category field, select a category of the item (or) create a new CategoryIn the Color field, select a color for the item (or) upload the relevant image to the item by selecting the Upload image option available in the right corner In the Pricing section, a table is displayed with the fields Variant name, Cost price, Selling price, Packing amount and SKU (Stock Keeping Unit)In the Variant name field, enter the name of the variantIn the Cost price field, enter the purchase price of the itemIn the Selling price field, enter the selling price of the itemIn the Packing amount field, enter the packing amount of the item for any preferred Order type. Note: By default , the Regular variant is displayed. Variant for an item can be referred to its size, shape or any user defined attribute. For example, a regular coke, a medium coke or a large coke.
Any number of Variant can be added to an item and their Cost price, Selling price and SKU can be set accordingly
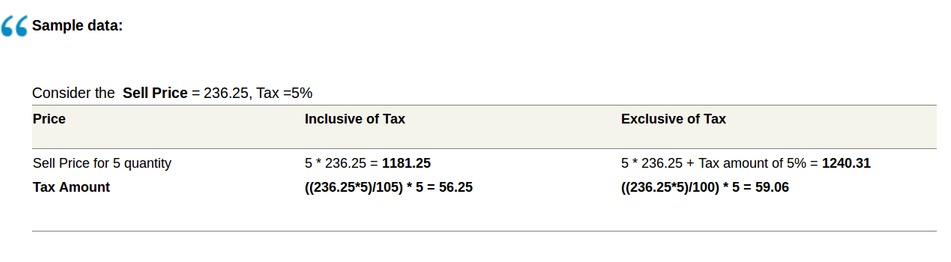
The Taxes section, contains fields Taxes, Tax inclusive, Service charge applicable and Service tax applicableIn the Taxes field, select the tax for the itemThe Tax Inclusive field displays No by default. Tap to change Tax Inclusive as YesYes - Indicates that Prices are Inclusive of TaxNo - Indicates that Prices are Exclusive of Tax The Service charge applicable field displays Yes by default. Tap to change Service charge applicable as NoYes - Indicates that Service charge would be applicable in the ordersNo - Indicates that Service charge would not be applied to the ordersThe Service tax applicable field displays Yes by default. Tap to change Service tax applicable as NoYes - Indicates that Service tax would be applicable in the ordersNo - Indicates that Service tax would not be applied to the orders 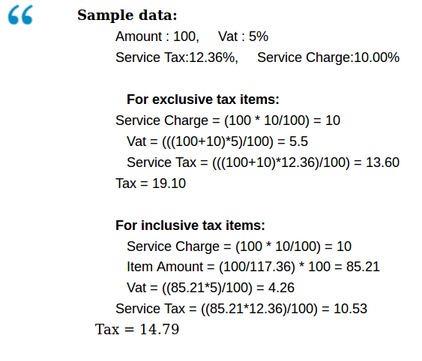
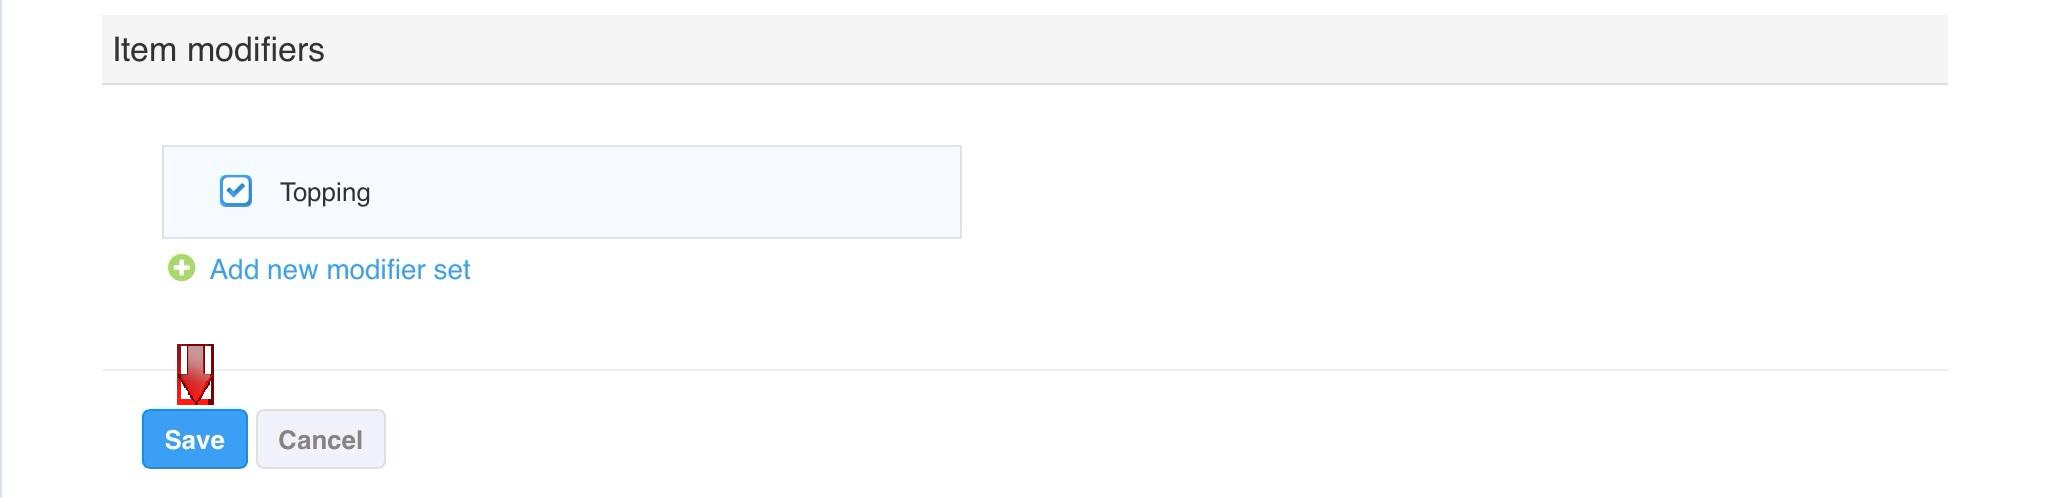
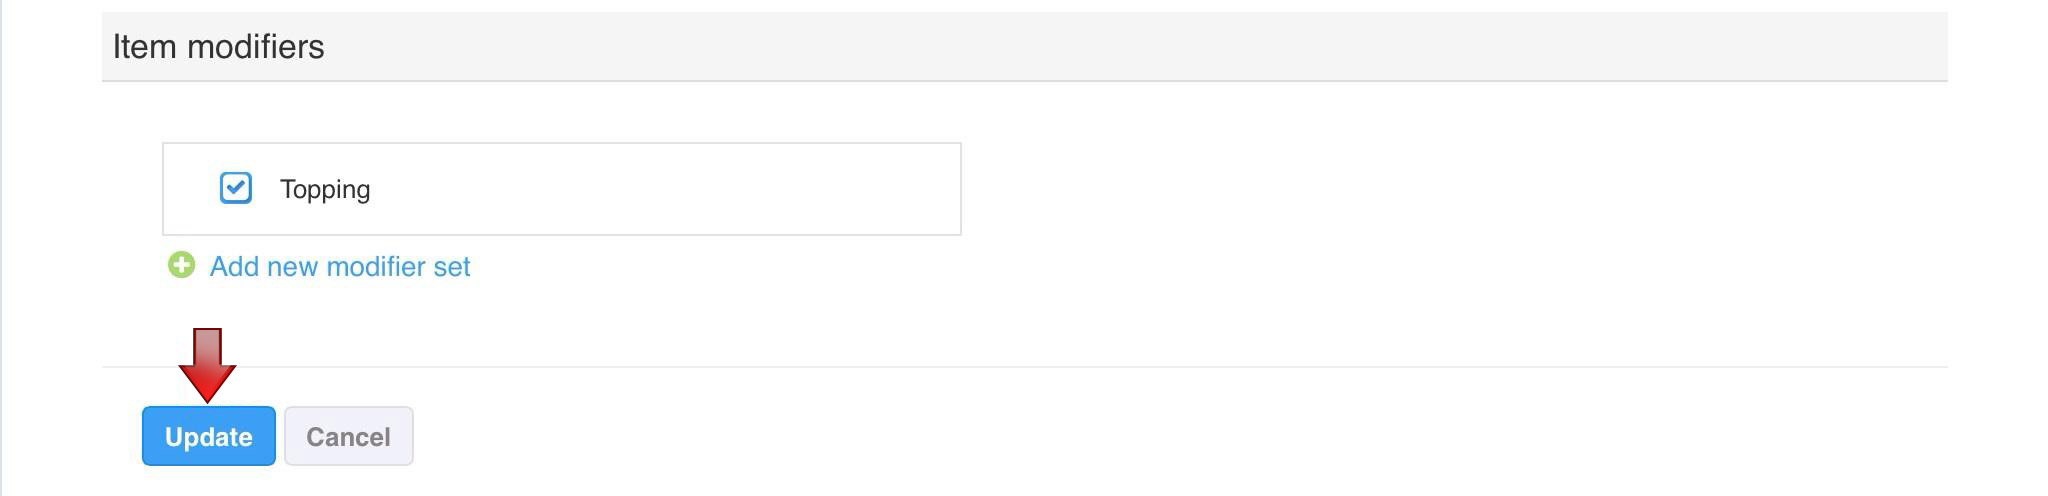
The Item modifiers section, allows to map Modifiers to the Item that is created.Select a Modifier from the available ones by checking the tick box(or) create a new Modifier following the link 3. Select
Save, to create the new Item
Note: The Status of the Item created is set, Active by default.
2. An Edit item screen is displayed
The Add item screen has sections Item detail, Pricing, Taxes and Item modifiersThe Item detail section, contains fields like Name, Category, Color and Item imageIn the Name field, enter the item nameIn the Category field, select a category of the item (or) create a new CategoryIn the Color field, select a color for the item (or) upload the relevant image to the item by selecting the Upload image option available in the right cornerThe Status field, is Active by default. Click to change the status as Inactive In the Pricing section, a table is displayed with the fields Variant name, Cost price, Selling price, Packing amount and SKU (Stock Keeping Unit)In the Variant name field, enter the name of the variantIn the Cost price field, enter the purchase price of the itemIn the Selling price field, enter the selling price of the itemIn the Packing amount field, enter the packing amount of the item for any preferred Order type. Note: By default , the Regular variant is displayed. Variant for an item can be referred to its size, shape or any user defined attribute. For example, a regular coke, a medium coke or a large coke.
Any number of Variant can be added to an item and their Cost price, Selling price and SKU can be set accordingly
The Taxes section, contains fields Taxes, Tax inclusive, Service charge applicable and Service tax applicableIn the Taxes field, select the tax for the itemThe Tax Inclusive field displays No by default. Tap to change Tax Inclusive as YesYes - Indicates that Prices are Inclusive of TaxNo - Indicates that Prices are Exclusive of Tax The Service charge applicable field displays Yes by default. Tap to change Service charge applicable as NoYes - Indicates that Service charge would be applicable in the ordersNo - Indicates that Service charge would not be applied to the ordersThe Service tax applicable field displays Yes by default. Tap to change Service tax applicable as NoYes - Indicates that Service tax would be applicable in the ordersNo - Indicates that Service tax would not be applied to the orders The Item modifiers section, allows to map Modifiers to the Item that is created.Select a Modifier from the available ones by checking the tick box(or) create a new Modifier following the link 3. Select
Update, to save the Edited Item
Note: The Status of the Item created is set, Active by default.