SearchShortlistTry & Buy a retail software with your complete knowledge and satisfaction. Once you downloaded the Go Frugal retail POS software then follow the steps to installing the set-up.

POS Point Of Sale
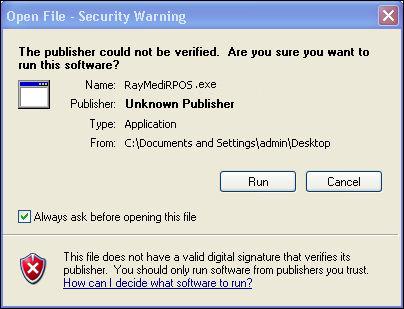
1. Go set-up and link Run. This will take you to the GOFRUGAL RPOS7 POS setup wizard and click next then POS application verifies your the system configuration.
2. The license agreement screen will be displayed after verifying the system configuration.
3. Select the option ‘I accept the agreement and click next.
4. Click browse to select the folder path where you want to install the point of sale software application.
Note: Drives other than C: is recommended for this POS installation then click Next.
5. The POS point of sale application will start installing in your computer in the selected drive. It takes few minutes to finish the installation process then a prompt screen will be displayed after finishing the installation.
6. Select the required option to continue further. We recommend to restart the system once for hassle free installation.
7. Click finish. The business configuration screen will be displayed and select the option server (or) main computer if you want to install as main computer or as a server that will store the entire database.
8. Select the option client (or) till if the system where the POS point of sale application is installed is one of the clients which will be connected to the store’s database server. To install the application in client machine,
Refer the link: http://help.rpos7.gofrugal.com/Setup-installation-in-Client-machine.html then clock next.
9. The registration screen will be displayed and select the option I am a new customer if you are new to this POS product.
10. In the email Id field, enter your e-mail id in which you will receive an one time password (OTP). This is mandatory.
11. In the Mobile number field, enter your mobile number. This is mandatory.
12. In the Installed by field, select Self if you are installing the application on your own. If the application is installed by GOFRUGAL Employee, he will select Employee/Partner in the Installed by field and enter his registered mobile number in the adjoining field.
13. Click Next to open the product edition screen. Before selecting the edition, you can compare the various features available for the different editions. Based on your requirements, you may select the desired edition.
14. Select the required edition for the installed product and click Next and Select the type of server then and click next and select the POS solution based on your Industry and click Next.
15. Click show more details to view additional details and click Next. If required, you can change the password.
16. Verify if the details are correct . Click Back to modify if you have entered any incorrect details then click Next to proceed.
17. Check your mail if you received the one time password and click ” OK ”
18. In the one time password field, enter the password which you received recently in your mail id and click next.
19. Select the check box ‘Yes I agree’ if you want to delete an existing database and create a new setup.
Note: The above screen will be displayed only if you have already done the product installation previously. For users who are installing for the very first time, this step will be skipped.
20. Click next. The welcome screen will be displayed then enter the new password in the Change Password screen and click modify then use the normal user login to open the application and proceed further. The service user login will be used by GOFRUGAL employees for support/assistance.
Note: By default, the application installed will work only for 2 days. In the meantime, our team will contact you soon to extend your license and assist you.
If not yet identified a best POS solution to your business click here POS Download.
Suggested Blog :Top 10 retail software in India.